Microsoft Teams has become a staple in collaboration and remote communication, especially within our current global health crisis.
If you are currently using Microsoft Teams, you probably have experienced videoconferencing internally with your team members or even externally with other clients. However, have you tried having a Live Event? Teams Live Events give you the opportunity to host a self-produced live broadcast through the Teams platform and connect with the world in a whole new way.
Welcome to neoRhino’s Microsoft 365 – Easy as 1-2-3 series, where we cover what you need to know and how to maximize your experience when adopting Microsoft’s flagship productivity suite. Today, we are going to cover the step-by-step process of setting up and successfully broadcasting through Microsoft Teams Live Events.
What is a Teams Live Event?
Teams Live Events are an extension of Teams meetings, enabling you to produce events for large online audiences with more control over video, audience interaction, and reporting. You can perform a Live Event as a solo project or you can assemble a team of organizers and producers for your session, and you can even have an optional Live Q&A section for your audience to ask you questions on the fly.
Microsoft recently adjusted their Teams Live Event Limitations to assist those who are broadcasting remotely during this year’s pandemic, but as of now, is still honoring these limitations.
- Attendee limit
- Up to 20,000 attendees (formerly 10,000)
- Concurrent events
- 50 events can be hosted at once (formerly 15)
- Event duration
- Up to 16 hours per broadcast (formerly 4 hours)
What do you need?
Any team member that will be presenting during your Teams Live Event will need a Desktop or Laptop Windows PC or MacOS device, your choice of audio and/or video equipment, and of course, an internet connection. As of this writing, Live Event presenters cannot broadcast from mobile devices or through web browser, so the app is required for broadcasting live.
If you have not done so already, you can download the Microsoft Teams app directly from teams.microsoft.com, provided your Microsoft 365 license includes Teams. You can also download the app from the Microsoft Store on your Windows 10-enabled device. MacOS presenters will need to download the app from teams.microsoft.com, as the app is not available in the Apple App Store, then give the app the necessary permissions.
What do your attendees need?
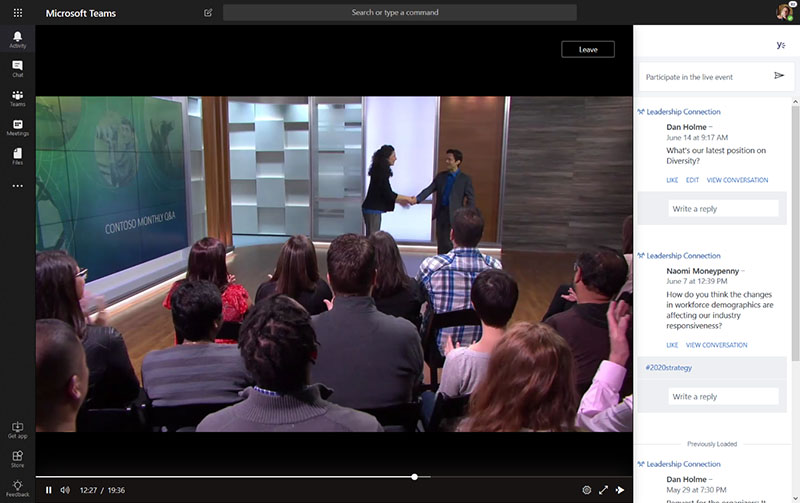
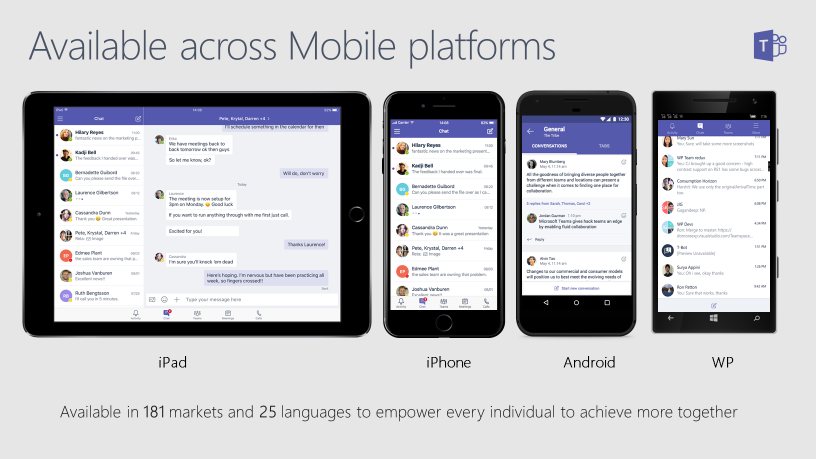
Attendees can attend your Teams Live Event by desktop/laptop Teams app, web browser, the official iOS, or Android app. NOTE: Teams Live Events can not be viewed from a mobile web browser at this time.
These are the requirements for Teams Live Events:
- Windows 10 (32-bit and 64-bit), macOS X 10.10 and later
- Android 4.4 and later, iOS 10 and later
- Supported web browsers: Google Chrome, Microsoft Edge, Mozilla Firefox, Internet Explorer 11, Safari
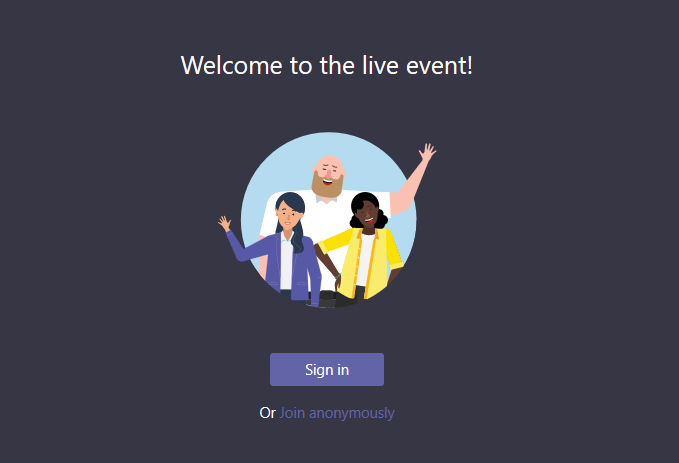
If viewing by desktop web browser, third-party cookies must be allowed and must support Microsoft Azure Media Player. If an event is public, anyone who has the link can attend without logging in. If the attendee is already signed in to Teams, they will join as an authenticated user.
If not or if they do not have a Microsoft account, they will join your event anonymously on the web. Keep that in mind when setting up your permissions.
How to get started?
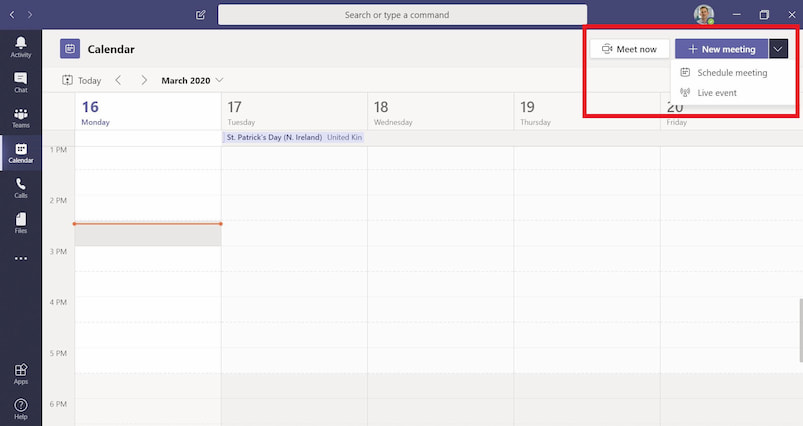
You create a live event the same way you create a Teams meeting. In your Teams Calendar, choose New Meeting, then choose New Live Event.
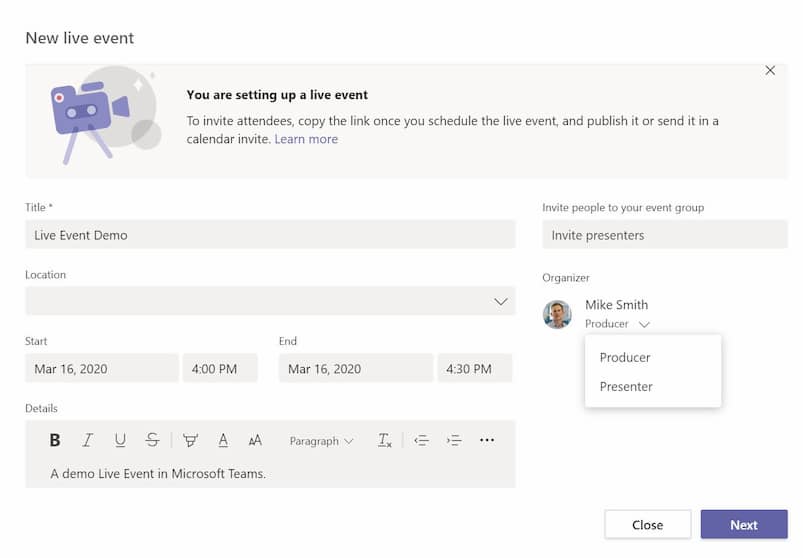
You can fill in the details of your Live Event here:
- Event Name
- Event Location
- Event date and time
- Meeting details
- Assembling your team
As the organizer, there are two types of people within your team to take part in your event. They are known as producers and presenters. The drop-down menu on the right lets you add people to your event, then choose what role they will have.
Your producers manage the event, including controlling what is being shared, moderating the Q & A chat, and opening and closing the session. The presenters only have the ability to present content during the event and answer Q & A questions. You can have up to 250 total Presenters and Producers but only the 10 most recently active in the Event will be allowed to present.
Think of the producer of your Live Event like the producer of a movie! The producer basically is the one who oversees the entire production, while the presenters are stagehands, or if on camera, potentially your actors.
Now choose your permissions. This is where you select the level of accessibility for your live event. Your three options are:
- People and groups: If you select this, you will see a box where you can add a person by name or email address – or you can add a specific group you create within Teams.
- Org-wide: This will enable anyone within your organization to join the event simply by logging in to their Microsoft account.
- Public: Anyone can join your live event – as long as they have a link that you provide to them.
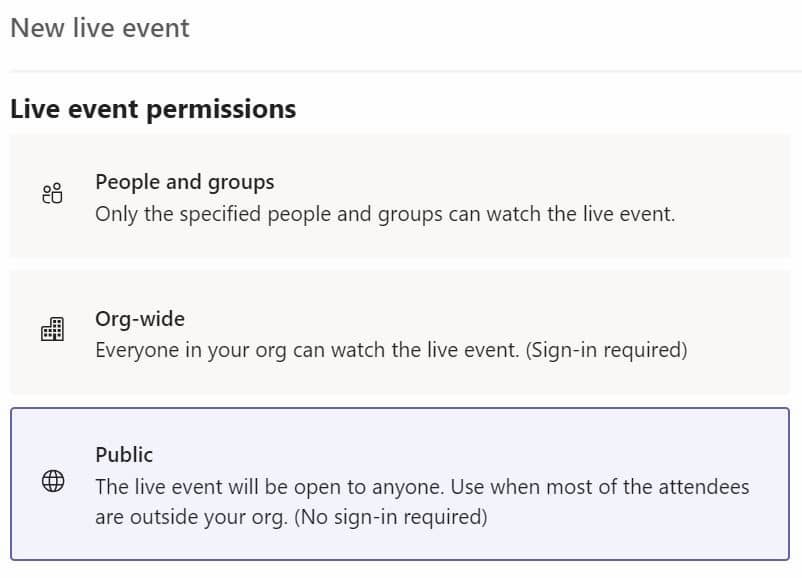
The link to the meeting is generated when you finalize the event. The public option may be not be available by default so you may need to contact your administrator or IT provider to enable this option.
Then you’ll choose who has access to the recording of the event after it ends. (pause on click) You can enable whether you wish for your attendees to download a copy of the event, if you want to receive an engagement report for your attendees, and to enable your Q & A session. If enabled, the recording will exist as a link for your attendees that you can revoke access to at any time but remains downloadable for 30 days.
The last option is if you are connecting any external equipment for the event that you plan to share such as an external webcam or a video capture device. Then select schedule when you’re done.
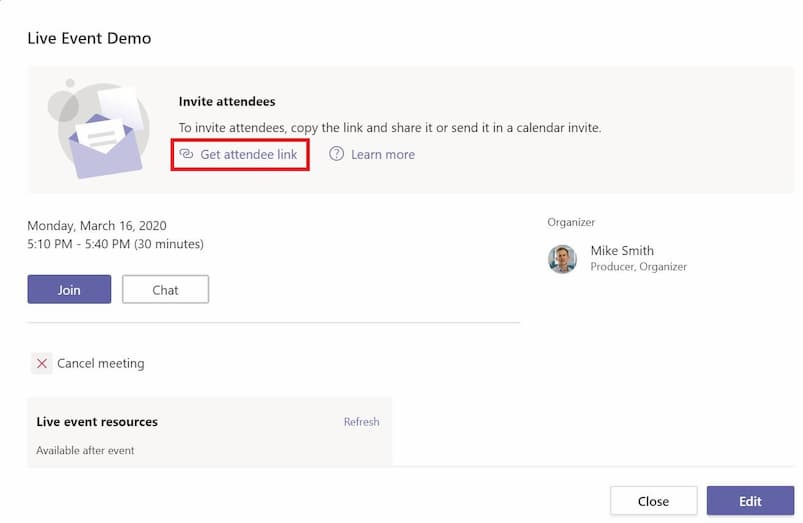
You’re in the final stretch! You’ll see a clickable link that says, “Get Attendee Link.” You can send it to anyone you wish to attend by email, calendar invite, or through a post on Teams.
How to Go Live
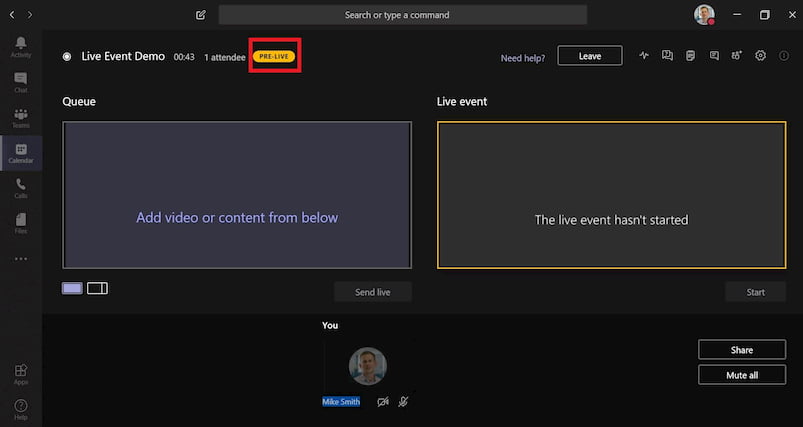
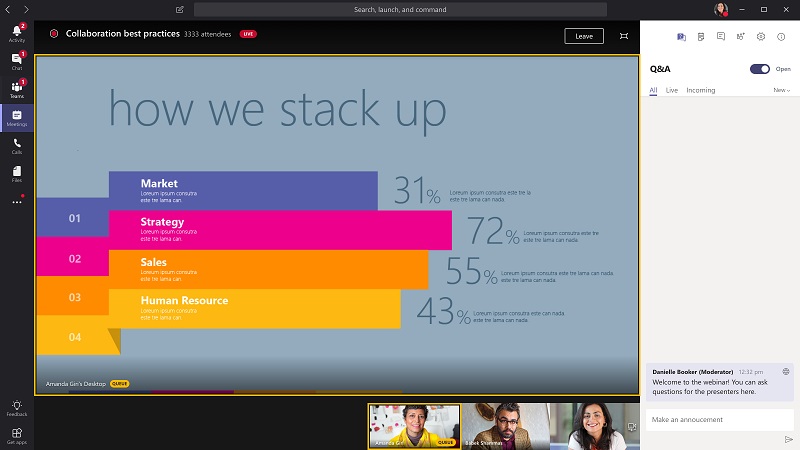
That is what the Producer’s Screen looks like in a Teams Live Event. There are three main areas:
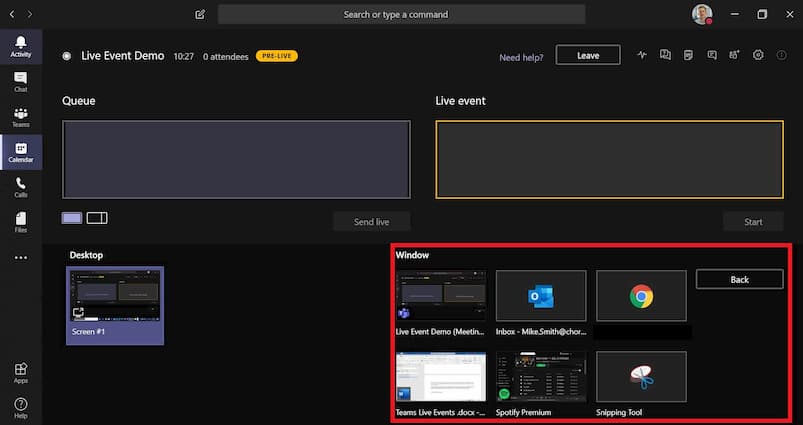
On the right side you’ll see the Live Panel, which is what your audience is will be watching. On the Left side is the Queue. At the bottom, you’ll find the content to bring into the queue. Such as your presentations, other video feeds, or websites. This can be content residing on your device or a link to where you can retrieve it online.
Select Share underneath the Live Panel, then add your content from the bottom panel. Whatever content you select first will be brought into the queue. Once you’ve decided what you wish to go first, choose Send Live, then select your next content to feed into the queue.
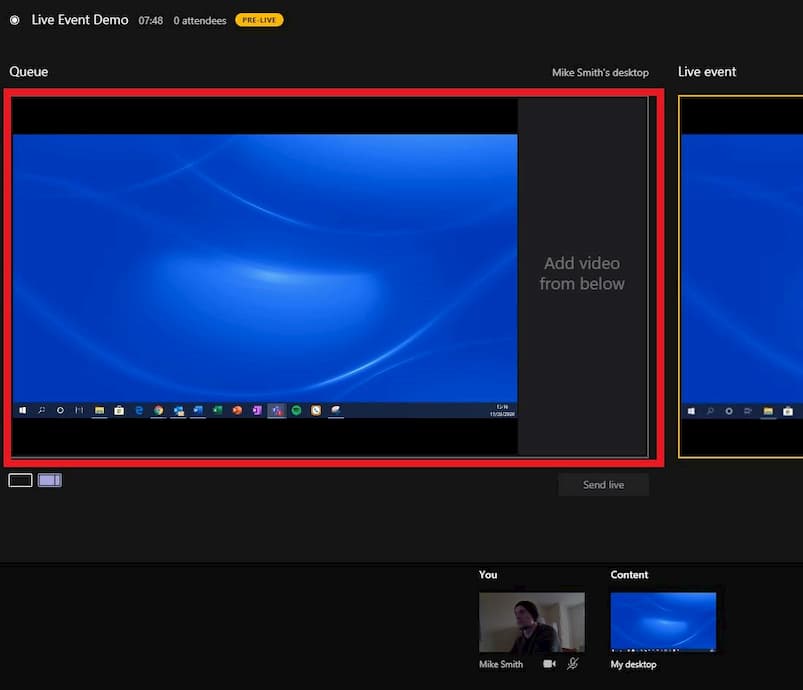
You have two view options how to share your content in the Live Event. There are two buttons to choose your attendee view during a live event, which appear below the Queue.
- Single View only shares your chosen content.
- Content-Left places the content on the left side of the panel and you can choose a second source, mainly a webcam or separate video.
When you’re ready to go Live, select Start. You will get a confirmation screen before the feed goes live alerting you that your session is about to begin and how there may be a delay between you and your audience due to the nature of live broadcasting. If so, choose Continue, and you’re on! You will then see the Start button turn red and say End, when you’re ready to close the event.
A few more notes about Teams Live Broadcasting you should know:
If attendees come into your live event early, they will receive a screen that says “The Live Event Has Not Started” until you go live.
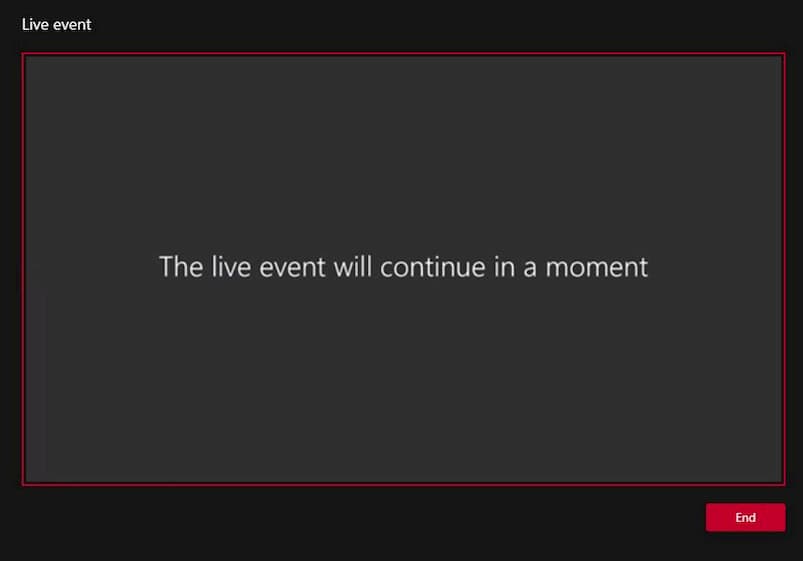
If you want to switch content during a meeting, click ‘stop sharing’. The Event will continue but and the attendees will see this screen while you find your next piece of content to share.
However, if you were displaying your video next to your shared content using the ‘content left’ view (such as your webcam), your video will then be shared full screen with attendees while you find the next piece of content to share.
Also be aware that if a Producer or a Presenter clicks 'share' and selects some different content, this will push straight into the live and attendees will see the content. Therefore, you'll want to rehearse your event beforehand and make sure each member of the team knows the timings for actions such as sharing and when their video is going to be live.
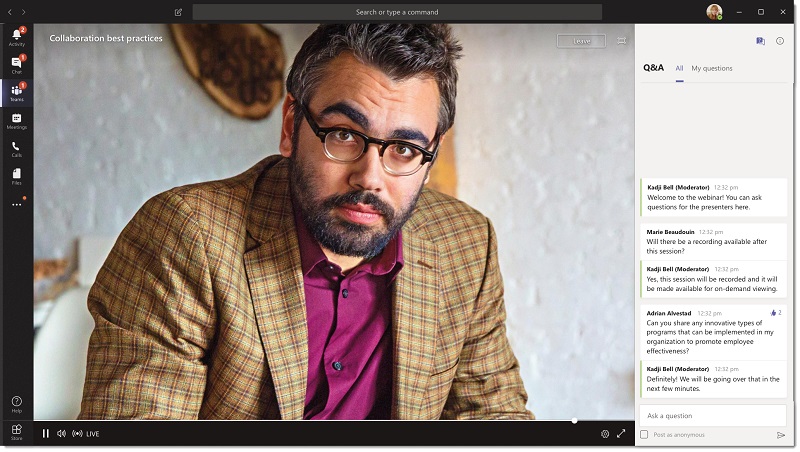
How does Q&A work?
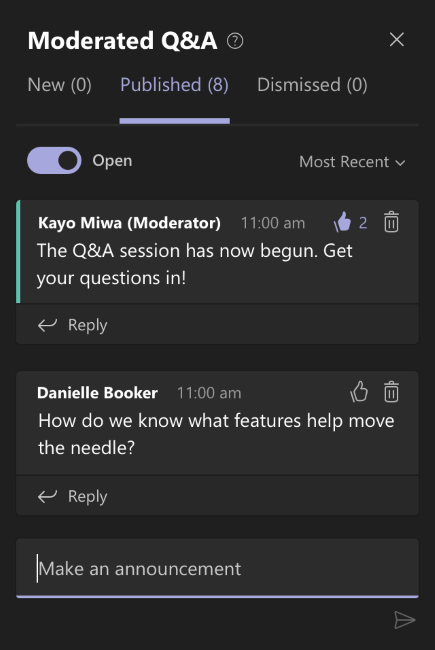
The Q&A session of a Live Event is similar to a livestream’s chat session under the watchful eye of your producers and presenters. Your attendees’ approved questions will populate in a collapsible side of the window should you choose to have a Q& A session. Your team has full control of what is seen to all attendees in the Q&A window, and also have the ability to mute or boot people if necessary.
Attendees can see featured questions as well as questions they have asked under the My questions tab. Your team and the attendees also have the ability to “Like” questions a ’la Facebook and keep track of their activity.
However, your team will need to approve any questions in the session before they are published. Any dismissed questions will still be available for viewing. The questions you choose to publish will appear as ‘Featured’ questions to attendees. You can also use the button ‘Make an announcement’ to publish message to all attendees. This is useful if you want to say something along the lines of “Hi everyone, the event will be starting in around 5 minutes”.
Unlike many other live stream formats, keep in mind that the Q & A session will end once you end the Live Event, but you will have access to the activity in the reporting.
What happens to my broadcast?
Teams Live Events are powered by Microsoft Stream, the video streaming service app of Microsoft 365. If you enabled the download during your setup, once your live session is complete and after the video renders (this may take some time depending on how long your Live Event is), it resides in the Stream server for 30 days for your team to download a copy of.
If you have enabled the download for your attendees, they will receive a link to view the recording by email for that same 30-day period, or you can send them a link to watch at their pace.
A few more quick tips for Teams Live Broadcasting:
- Practice and plan your production way in advance. Use your practice session to plan out your complex transitions, such as if you are doing a cutaway to another presenter and need to come back. It could be seen like a news broadcast. They carefully plan broadcaster transitions and know their timing before going on the air.
- Watch your bandwidth. Use your practice periods to also have dry runs to test your bandwidth. Try to be hardwired as much as possible, especially the presenter. If you can’t, be as close to the wireless router as possible. We also have some tips and tricks for testing your home bandwidth if you plan to broadcast your events remotely.
- Keep the queue clean. Always verify your queue before going live. Make sure that every presenter knows what they are sharing and what their responsibilities are during the event.
- Have good video and audio quality. If you are going to be on camera during your event, have proper lighting and center your shot well. We have some tips on web conferencing etiquette that could give you a good idea on how to be a good Live Event host. But don’t forget your audio! Some attendees may only be listening so be sure that your presenters have good microphones and have tested their in-room audio to eliminate any distractions.
Teams Live Events bring a wonderful opportunity for you to connect with your clients, prospects, and the rest of the world and we are here to help you maximize your usage of the vast application world of Microsoft 365.
neoRhino is equipped to maximize your experience with Microsoft’s 365 family of apps so you can keep your productivity at an optimal level. If you have questions or would like to speak with one of our associates about our services, contact us or give us a call at (281) 779-4850.
*All images are courtesy of Microsoft and Microsoft Community.


