
Throughout the past few months, Microsoft Teams has become an essential tool for helping businesses conduct meetings during the challenge of not being able to have traditional meetings. However, have you ever heard of the Microsoft Bookings app?
Welcome to neoRhino’s Microsoft 365 – Easy as 1-2-3 series, where we cover what you need to know and how to maximize your experience when adopting Microsoft’s flagship productivity suite. Today, we are going to cover how you can utilize the new Microsoft Bookings App to easily create appointments for your clients, prospects, and beyond.
What is Microsoft Bookings?
Bookings is an app in Microsoft Teams that allows you to schedule virtual appointments with others. If you need to manage the calendars of multiple staff members or wish for a unified way of having meetings internally and externally, Bookings suits your needs.
Bookings appointments are still held through Microsoft Teams Meetings, but the app makes it easier to set up appointments and keep track of your busy schedule.
Getting Started:
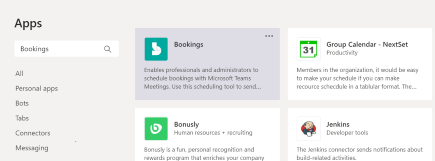
- Go to Apps on the Teams side bar. Search for Bookings and click Add to add it to your panel.
- Log in, then click Get Started.
You then get two options for making calendars in bookings: New Booking Calendar & Existing Booking Calendar.
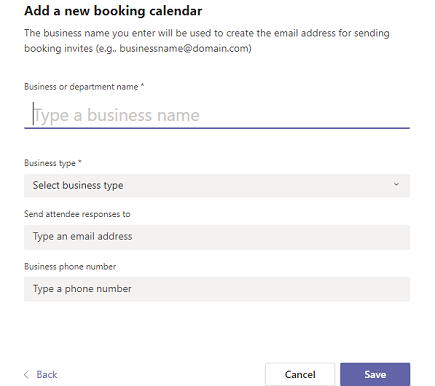
New Bookings Calendar is for when you want to start a booking from scratch. You will need the business name, type of business, and email addresses of the contacts you wish to send responses to.
Also, what you type as the business or department name will be used to create the email address for sending out invitations and will show up in the attendees’ appointment emails. You can change your business name later in stings, but the email address will not change once the invite is sent. So be sure to double check that you have the correct email address before you finalize the booking.
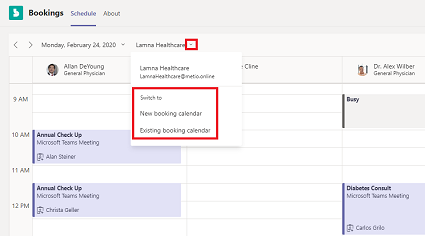
If you choose Existing Booking Calendar, you can search within Teams for contacts to create your booking. You can search by Business Name or department for an exact match. If you already have the details of the organization saved within Teams, it will populate for you.
Adding Members:
You can add members of your organization to your booking by selecting Add Staff from the right side of the app. From here you can choose whether they will be a Viewer or an Admin.

While viewers can only access their booking invitations and conduct virtual appointments through a Teams Meeting Link, Admins can also add/remove staff, create or edit existing bookings, and make changes to app settings.
Appointment Types:
If you see yourself making repeat bookings of the same conditions, then you can create templates in bookings as Appointment Types.
Go to More options, then Settings. Select Appointment types, then Add appointment type.
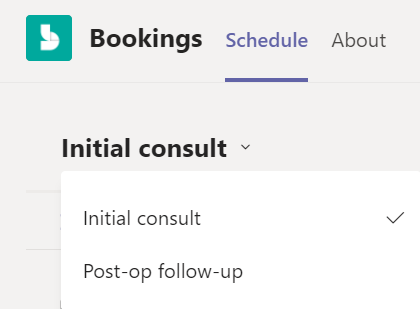
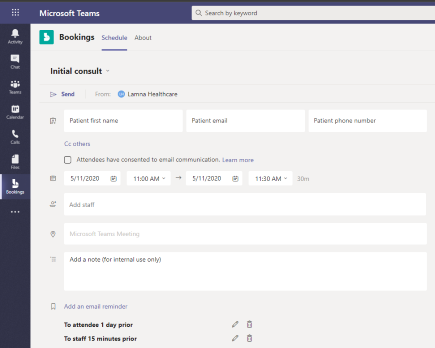
Any time you create a new booking, by clicking the drop-down menu, you can view your Appointment Types and select one you wish to use. Keep in mind that your attendees will see whatever you write for the title, confirmation message, and reminder message in the form every time you book from your appointment types.
Once you choose your Appointment Type, fill out the necessary information for the booking. You can then add optional reminders and even separate your responses by whether it’s an attendee or staff member.
When you are finished, click Send and you are all set!
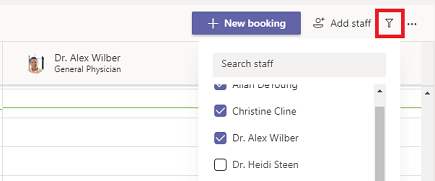
You can also use the Filter options next to the Add Staff button to manage your multiple staff schedules or if you need to reference any pre-requisite steps, create booking summaries, or just need further explanation on your meetings.
You can also publish a self-service scheduling page, add a company logo, and set business hours to include in your booking invitations.
What will your attendees see?
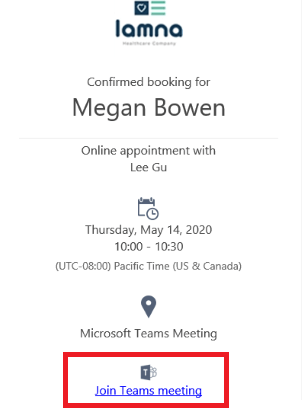
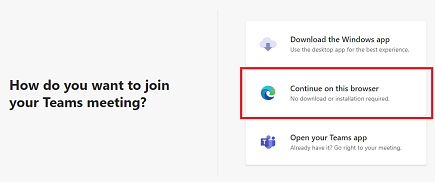
Attendees will need to use the Join Teams Meeting link within their Bookings invitation. If they are joining by desktop, similar to a Teams Live Event, they can join through the Teams app or can join through their web browser. However, mobile users will need to download the Official Teams app in order to join your meeting. You can download the Teams app from the Google Play Store or Apple App Store.
When attendees are waiting in the Teams meeting lobby, you can let them join in by selecting Admit when you are ready.
Now the meeting has started, which you can conduct by a video or audio call. You get the same functionality like you would in a Teams Meeting, such as being able to share your screen or blurring your background.
neoRhino is equipped to maximize your experience with Microsoft’s 365 family of apps so you can keep your productivity at an optimal level. If you have questions or would like to speak with one of our associates about our services, contact us or give us a call at (281) 779-4850.
*Images courtesy of Microsoft.


